Monday, April 30, 2012

DIY Candle Making


What you will need:

-Container for the wax
-Wax
-Essential or Fragrance Oil
-Wick that's compatible with your wax
-Pencil
-Double Boiler (I use a plastic measuring cup and regular pot instead)


You can use cups, tin containers, wine glasses, anything like that.  I use Mason Jars.  I found these 12 ounce containers at Walmart for $6.95 per dozen.  With taxes that makes them come to .63 cents each.  Plus, I like them better than the name brand because there is no etching or writing on them and it looks better for my label.


 You can find wax at any local craft store or online.  I personally use soy wax that I order online.  It comes in "chip" form.  That makes it easier to melt.  Wax at Michael's usually comes in a two pound block and it is best to cut it up as small as you can, but it doesn't have to be perfect.  One pound is equal to 16 ounces.  So you can get 2 1/2 - 12 ounce candles or 4 - 8 ounce candles with one container for about $9.99.  (Look for coupons to possibly get 40% off.  Especially at Michael's!).


You can use a double boiler for the next step.  But I sell wax melts for my business and I found it MUCH easier to buy plastic measuring cups at the Dollar Tree and labeling them for each individual scent that I have so it's easy to pour and there is ZERO clean up.  If you are doing it this way, fill a regular pot up a little more than half way with water and put the measuring cups inside with the handles hanging out.  My pot has handles on the side where I can hook the measuring cup handles into and it keeps them steady while the water boils.


 This is the way the wax will look as it melts.  You can leave it be until it melts completely, or use a spoon to break it apart so it will melt faster (like I started to do to the container on the right).


***If you would like to add candle dye (available in the candle department at any craft store) this would be the time to do it.  I don't ever use dyes, it's just my preference because I have a young son and him and colored wax doesn't mix well lol.  Follow the directions on the candle dye container.


While the wax is melting, you can prepare your wicks.   Make sure that you buy the wicks that are compatible with your wax.  It will clearly say it on the container.  I got this one at Michael's for $4.99 for six.  Making them come to almost $1 a piece after taxes.


Take your pencil and start wrapping the top of the wick around the pencil in a circular motion until the bottom of the wick is firmly touching the bottom of the container and the pencil is holing it straight up to the top.


Once your wax is completely melted, add your essential or fragrance until your wax is the strength you are happy with.  I usually use about an ounce of oil for every pound of wax.  This is totally up to you.  Stir the oil in and pour your wax into the container. 

It's okay if your wick moves a little during this process, just center it again when you are done pouring.  

 Let it cool!


If the top looks a little jagged like this after it cools, you can make it look flat and even by either adding more scented wax to the top or using a blow drier to re-melt it so it will harden evenly.


Trim your wick and decorate the jar with a pretty ribbon or label!  Enjoy!!!

For one 12 ounce jar, the cost is  $6.23!  
If you use the 40% coupons for the wax and the wicks it's only $4.83!
A pretty inexpensive (yet personal) gift to give to people! 

Saturday, April 28, 2012

DIY Floor Cleaner

I have NOT made this yet.  But I wanted to post the website that my friend, Lyndsey shared with me.  I will update this post as soon as I try it for myself!  Thanks Lyndsey! :)

DIY Floor Cleaner

DIY Fabric Wreath


I found this cute little owl at the Dollar Tree a few months ago and I've kept him stored away until I found the right craft for him!

I am hoping to make quite a few Christmas wreaths to sell when the time comes, but that's so far away!  So I decided to make one now to sell at my next Trade's Day and to use my owl.  This is how I did it!


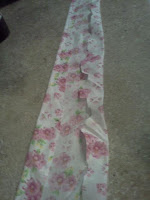
Pick out the fabric that you want to use and cut it into strips.  It does NOT have to be perfect in ANY way.


Foam wreaths are so expensive!  These straw ones are almost half the price and if you leave the plastic on, they look exactly the same but STURDIER!  And they are almost half the price of foam. 


Hot glue one end on the fabric strip onto the wreath and wrap it TIGHTLY around the wreath until you get to the end of the strip and secure that end with the hot glue as well.  Keep repeating this step until the wreath is completely covered.


At this point you want to decide what (if any) accents you wish to make.  I wanted to add an accent using the fabric I already had.  So I decided to make a bow with it.


 Take a strip of fabric and run a line of hot blue down each side and fold it over to create a "seamed" look.  REMEMBER!!  It does NOT have to be perfect!!!


Tie the strip into a bow!  The owl already came with some attached fishing line and hanging it from the bow is a REALLY cute option.  Its simple, classy.

Ultimately, I decided to add a beautiful flower that I had by hot gluing it in the center of the bow and perched my owl right next to it (securing it with hot glue as well).  As I've said, I have a small country home.  I think my little country wreath is a sweet accent to my front door. Your wreath can be anything to reflect your personality.  Just have fun with it!!!


Fooled Me Once...Shame On You...

I was hanging out in the paint section at my local Wal-Mart (looking for "oops" paint that evidently they no longer carry *boo*) ...when I saw the most AMAZING THING!  Magnetic Spray Paint!!! The crafter in me instantly started thinking of a million things that I could do with such a neat little invention. 

But first, I needed to know if it was clear.  I asked the store associate who was kind enough to test it out for me and it did indeed appear to be clear (it's not btw).  I also bought an 18x24 frame and decided to create an UBER cute background behind the glass of the frame, and then spray the magnetic paint on top of the glass to make a magnetic shadow box of sorts.  Cute idea, right?

By the time I was done creating the background, I was feeling pretty proud of myself and my craftiness.  I put it in the frame and grabbed my spray can and gave the glass a good dose.  Which turned it completely gray.  :(  Not giving up, I thought "okay"  I'll put the fabric OVER the glass and if the fabric is thin enough, it will still work!

I STILL think it will work, but I won't know until I buy another magnetic board and cover it with fabric and see.  Apparently "Margnetic Spray Paint" is too good to be true because I couldn't get ANY  magnets to stick to it (with or without fabric on it).  Pooh...

I heard that other people have had success with the actual paint instead of the spray can.  I don't know anything about it personally.  But I am not giving up on the idea!  I'm going to look up some coupons and go to my local craft store (I LOVE Michael's!) and find a magnet board and try it a different way.  Wish me luck!

Friday, April 27, 2012

Good Night..But STAY POSTED!!

I will be making some magnets, magnet boards, laundry signs, candles and so much more this weekend!  I also need to add the recipe for my MIRACLE CLEANER that I found on Pinterest, AND I made "Popcorn" Cupcakes for my son's birthday and I will be posting pictures and a how-to for those (relax it's not REALLY popcorn!)  So much to do...so little sleep :0)  Goodnight EVERYONE!

Do it Yourself Liquid Laundry Detergent

As a mommy and wife, it seems as if my entire world REVOLVES around laundry.  No matter HOW HARD I try, there are ALWAYS dirty clothes in my hamper!  While watching "Nineteen Kids and Counting"  I discovered that the Duggars make their own laundry soap!  Right away I knew I had to make it too.  I made a small batch of powdered soap and it was fine.  But I love my liquid detergent!  got this recipe from http://www.thefamilyhomestead.com/laundrysoap.htm

Before anything else, I went to the Dollar Tree and bought an "Iced Tea" jug to keep my soap in.  You do not have to do this at all.  It was just something I chose to do.  Because this recipe will create TWO GALLONS of soap, you will need enough containers to store it in as well as a pot big enough to make it in.  For my extra gallon of soap, I used an empty water gallon jug that I made SURE to mark clearly because the soap IS clear.  I don't really think anyone could mistake a gel liquid for water, but better safe than sorry :)  I had bought a "soap grater" (which is actually just a cheese grater that I ONLY use for soap) at the dollar store a while back when I was making my soap balls.  I also have a wooden spoon that I bought at the Dollar Tree as well to use JUST for soap.

You will need:
1/3 bar of Zote Laundry Soap (or any other laundry soap your store may carry)
½ cup washing soda
½ cup borax powder 
Cheese Grater
Spoon
Funnel (Optional)
Pot big enough to hold two gallons OR a bucket big enough to mix two gallons in
Containers to keep your new Laundry Soap in! 


Grate the soap and put it in a sauce pan.  Add 6 cups water and heat it until the soap melts.  Add the washing soda and the borax and stir until it is dissolved.  Remove from heat.  Pour 4 cups hot water into the bucket.   Now add your soap mixture and stir.  Now add 1 gallon plus 6 cups of water and stir.  Let the soap sit for about 24 hours and it will gel.  You use ½ cup per load. 


Note:

~The finished soap will not be a solid gel.  It will be more of a watery gel.
 
~The soap is a low sudsing soap.  So if you don’t see suds, that is ok.  Suds are not what does the cleaning, it is the ingredients in the soap.

Optional: If you want your soap to have some sort of scent you can scent this with ½ to 1 oz. of essential oil or fragrance oil of your choice. 

Total cost: SEVENTY ONE CENTS for 64 loads of laundry!!! 
 

Thursday, April 26, 2012

Do It Yourself Clorox Clean Up


Again, ALL of the "Do It Yourself" cleaner recipes I have came from the same source.  I have PERSONALLY made and tried them all and I LOVE them (and the money I saved).  I REALLY want to give credit to the site where I got my recipes from so I will take time out specifically to find that site and I will let you all know where I went to for all of MY tips! 

PLEASE make sure to NEVER mix ammonia and bleach!  It can be lethal!!! Check your laundry detergent before mixing!  Usually, laundry detergent doesn't have ammonia  but you can NEVER be too careful!!

Total Cost Per Bottle: TWO CENTS!!

1 Empty and Rinsed-Out Bottle of Clorox Cleanup/Empty Plastic Spray Bottle
1/4 Cup Bleach
1 Teaspoon Laundry Detergent
Fill the rest of the bottle with Water and Shake!

Do It Yourself Windex


I REALLY need to find the site where I found all of these recipes on.  But I have had a LOT of electronic issues lately.  I know I will come across it again soon and when I do, I will give a BIG shout out them to give them the credit they earned.

After creating the Febreeze, I realized how MUCH money I spend on cleaning products a month.  I am a cleaning fanatic.  Its a really hard obsessile our on to have while living in the county with a small child, husband and three pets.  I just do the best I can!

I have a glass kitchen table and glass coffee table.  So I was REALLY skeptical about how well this would work.  I shouldn't have been!  It works like a DREAM!  Again, I just used an old Windex bottle.  I bought all of the supplies at the Dollar Tree for $1 each.  Total cost per bottle of "Windex":  TWENTY SEVEN CENTS!!!

Bottle
1/8 Cup (1oz) White Ammonia
1/4 Cup (4oz) Isopropyl Rubbing Alcohol
1 Drop Laundry Detergent
Water - To Fill The Bottle 

Do It Yourself Febreze


I am obsessed with smells.  I have admitted this a HUNDRED times over.  I was able to experience what life is like without being able to smell when I was pregnant with my son.   Instead of having a heightened sense like MOST women...I lost mine completely by my third trimester.  It came back after I had him, but I was genuinely concerned for a while. 

As I mentioned in my first post, we are fixing up a VERY old farmhouse that was built by my husband's great-great-grandparents.  I love the charming appeal of our little country home, but I have zero appreciation for the way an older home smells.  Scent is the strongest connection to memory and I want my husband and child to have the memory of our little home smelling clean and possibly like freshly baked goods. 

To create this "memory" I have enlisted the help of Febreze on more than one occasion.  Unfortunately, by the time you give your home the shower is so desperately deserves, you have almost used an ENTIRE average bottle in one use.  We are on a tight budget.  I cannot possibly give my Febreze/scent addiction the attention is deserves with results like that.  So as soon as I found a "Do It Yourself" Febreze recipe I literally jumped up and made it that very moment.  I am happy to say that (in my opinion) this recipe is even BETTER than the store bought version.  AND it's MUCH cheaper. The total cost: FOURTEEN CENTS!!  OH YEAH! I changed phones, so unfortunately I don't have pictures.  I used an old Febreze bottle to put my mixture in.  ENJOY!


1/8 Cup of Your Favorite Fabric Softener
2 Tablespoons Baking Soda
Hot Tap Water - To Fill the Bottle to the Top

Shake up your spray bottle and get to spraying!!


Credit Where Credit is Due

I would like to apologize for not posting as much and as fast as I would like.  I have about a MILLION projects going at once and this week is no exception. I am SO EXCITED about all of the new projects I will be working on.  I would also like to take the time to give credit where credit is due. 

I have ALWAYS loved making things.  When I was younger I would cut up old clothes and make new dresses for my Barbies.  My grandmother practically raised me in the kitchen and together she and I made all sorts of crafty things from ornaments to decorative hats.  But I don't think I would have EVER gotten as far as I have without all of the wonderful bloggers out there who have shared their knowledge with the world.  I have spent a LOT of time on Pinterest and have been inspired a MILLION times over by the projects I have found on there.  The truth is that the information is OUT THERE to help you learn how to do ANYTHING that you put your mind to do.  You just have to WANT to do it, and more than that, you have to ACTUALLY do it.  I am not special or gifted in ANY way.  I just have a passion.  My only wish is to share my passion with others and make it easy for any person out there to learn as I have from others like me. 

Thank you all for your support and I look forward to any feedback or suggestions for future projects!